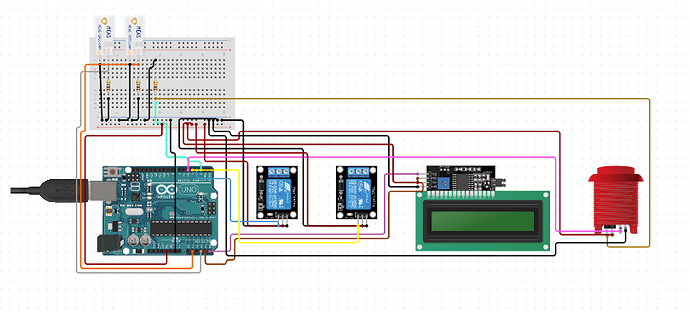
OK the challenge is that I want to build a pair of nerf quickdraw targets. I want to be able to press a button and then have the arduino wait a random 2- 5 seconds then turn a 12v LED on each target on using a relay. The lit LED means that each player may draw their blaster and shoot the target. once this happens I want to have a piezo sensor on each target to sense how fast each person was and then have the faster person’s target turn solid while the other person’s turns off. And to make it a little more competitive I would also like to add an LCD to display the time of each player. While I have a decent understanding on the construction of such a project I’m not 100% sure as to how one would write a code for it.
Sounds like fun. If you could add a link to the project on circuito I’ll be able to download the sample code. From there I’ll show you what and how I change it to do what you want.
Awesome! I’m pretty new to coding so I really appreciate the help!
https://www.circuito.io/app?components=512,11021,117693,117693,417986,689245,3061987,3061987
Thanks for the link. I’ve got the code now but my work day has started so I won’t be able to look at it for a while. Do you have a deadline for the project, or is it just for fun so it’s better to get it done well than done quickly?
For what it’s worth, my approach to writing software:
- Add the code to source control
- Remove what you don’t want to keep
- Break down the system requirements into features
- Assign priorities
- Start with the most valuable features
5.1. If possible, add tests to verify the code
5.2 Write the code, test it, commit whenever it works, repeat.
5.3 Repeat - Test, test, test. Test some more!

Well it’s going to be a cool gift for a friend of mine and I’m heading to his house early next month so we have a little over two weeks. Will that be enough time to make it good?
Actually i was wrong I’m not going up till the 27th of September so we’ve got a good 5 weeks at least.
That’s good news because I’ve just finished packing for a weekend canoe camping and it’s 21:15 here. I’ll make a start and you can follow along. I’ll post as far as I get tonight.
I’ve created a repository for the code on GitHub here: https://github.com/bernhard-hofmann/circuito.io-3392
You can follow along with the changes and what they are by viewing the history of the Targets.ino file: https://github.com/bernhard-hofmann/circuito.io-3392/commits/master/Targets.ino
You’ll have to remind me to carry on with this after the weekend. 
Wow thanks! that would be awesome for me to learn through the process! I don’t think I could thank you enough. Have a fun trip!
Just to keep the full conversation here and the code in GitHub…
That looks great! Each player will only get one shot however and if both miss its a draw so maybe we should put a 4 second limit on the timer.
We can add a timeout if you want but I imagined one of you would simply press the button again to start a new challenge.
Looking at the circuit itself; do you really need 12V LEDs? A basic 5mm red LED has a Luminous Intensity of 150-200mcd which isn’t at all bad and would save you having to buy relays. A circuit more like this one: https://www.circuito.io/app?components=514,9590,9590,11022,117693,117693,417986,689245
(Sorry, I switched to a nano because it’s all I have at the moment.)
But even if you do need/want 12V LEDs, do you need to control them with relays? I’m no electronics expert, but I would’ve thought a MOSFET would be better. Is there a reason you chose relays?
Well those were just the parts I had and I figured using a relay might be a bit simpler programming wise but obviously I’m new to this so that decision may have made zero sense. And as far as the lights go we are planning on using them outside and in the sun so I was worried they might be difficult to see.
Also yes the button reset would definitely fix that problem! Good idea!
Relays it is then. You could even use high voltage ones to control actual light bulbs! 
Well and to give you a better idea of what I’m doing heres a video of them in action.https://www.youtube.com/watch?v=riS68R_ao4A. I used nerf guns as to avoid explaining the complicated world of wax shooting however they would work in quite the same way. Again not looking to be deceitful at all just trying to make it a little easier for people to understand the concept with nerf guns rather than old guns using shotgun primers to shoot wax. My friend lets me and my church youth group to use his land and his targets to have a friendly competition so to repay him for his time and effort i wanted to give him a pair of functioning targets rather than just a couple of metal plates and a buzzer as the signal to start. Hope the use of guns doesn’t bother you but if it does i understand and know a number of people that it does.
long reply but wanted you to be on the same page and keep you out of the dark.
If you’re still willing when can we continue?(that is of course if you’re back)
Yeah I’m back but last night I had to make a sign for a friend so that was my evening gone. I’ll be looking at this after work tonight once I’ve finished the sign.
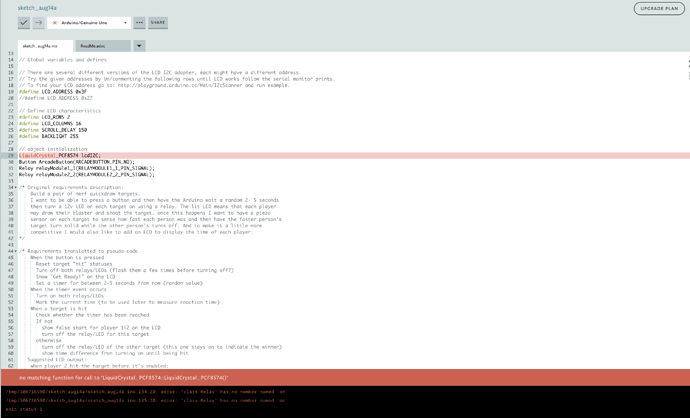
Then is now and I’ve made the first step. My apologies for the reformatting to Arduino standard (I was using VS Code) so it’s not as easy to see what I changed in the latest commit. (See https://github.com/bernhard-hofmann/circuito.io-3392/commit/a1e4f76c7de54153e2b38424ea9ce30587d72c5c#diff-c37de0a7b4ef954b97d9c92c7c4998d7) So I’ll explain it here;
I’ve added a few global variables to know whether the targets have been hit and the start time (startTime) which I intend to use as the variable that determines when the targets become active.
I’ll assume you’re new to Arduino code so you should know that the loop function (void loop()) is run over and over and over as fast as the Arduino can until the end of time or the power is cut. Usually the latter. 
In that loop we read the state of the button and then check if it’s HIGH (it’s HIGH when it’s pressed). I’m not sure whether the ArcadeButton class has a debounce filter so I added a 50ms delay at the end of the loop to avoid erroneous readings and to save a little power (in case you run this on batteries).
If the button has been pressed, we reset the hit status of both targets, turn both relays off, clear the LCD and write “Get Ready!” on it. Then we use millis() to read how many milliseconds it’s been since the Arduino started. We add between 2 and 5 seconds (2000~5000 ms) to this time to set the start time.
In the same loop (because the code is simpler than timers and this doesn’t need to be THAT responsive) we check if the elapsed time since power on (using millis()) has become the same as or more than the start time. If it has, we turn on both relays and print a message on the LCD.
Pressing the button again will turn the relays off again and set a new start time with a new random delay.
This isn’t complete, but it should be enough to let you test some parts of your circuit; namely the button, the relays, and whatever is connected to the relays (bulbs/12V LEDs). It’s always good to take small steps and resolve issues before moving on to avoid having to sift through more complexity than necessary when debugging.
Please let me know how you get on so that I know whether to resolve issues now or progress with more functionality.
Awesome thanks! I’ll download the code and get started!

